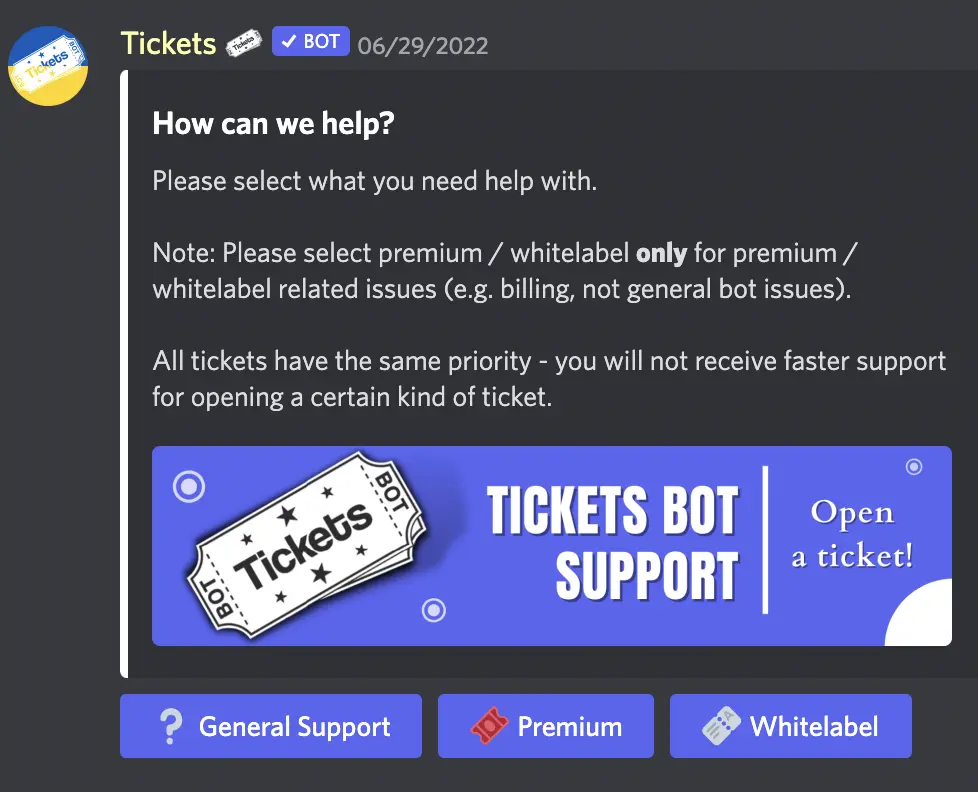
Multi Panels
Multi-panels are the combination of 2 or more Reaction Panels in a single embed:
Creating A Multi-panel
In order to create a multi-panel, you'll need to head over to the web dashboard and select your server. If you're unfamiliar with how to do that, read our guide on the web dashboard here.
Once on your server's main settings page, select Reaction Panels in the top navigation bar and you'll be taken to the reaction panel configuration page which looks as follows:
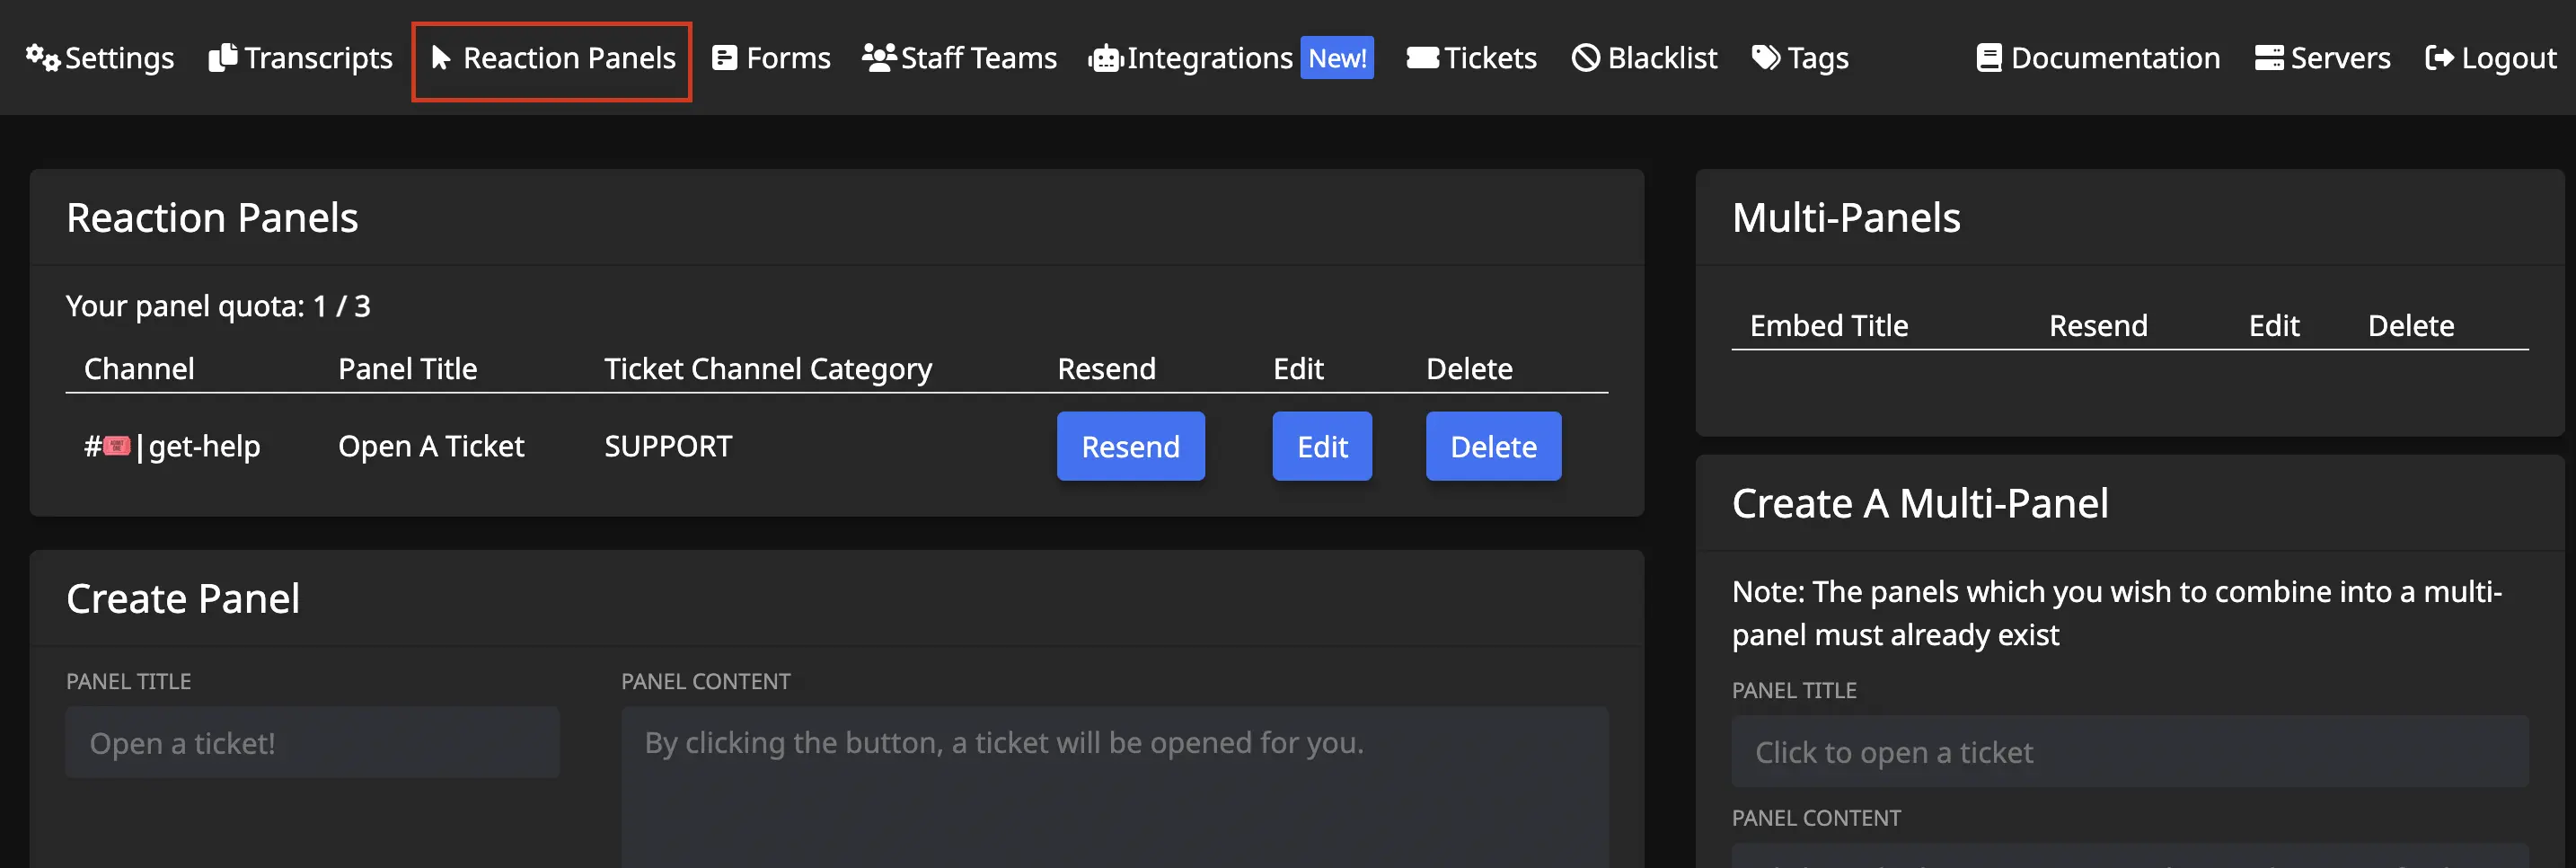
You'll want to focus on the right side of the screen. The left side are settings for individual panels (known as Reaction Panels.)
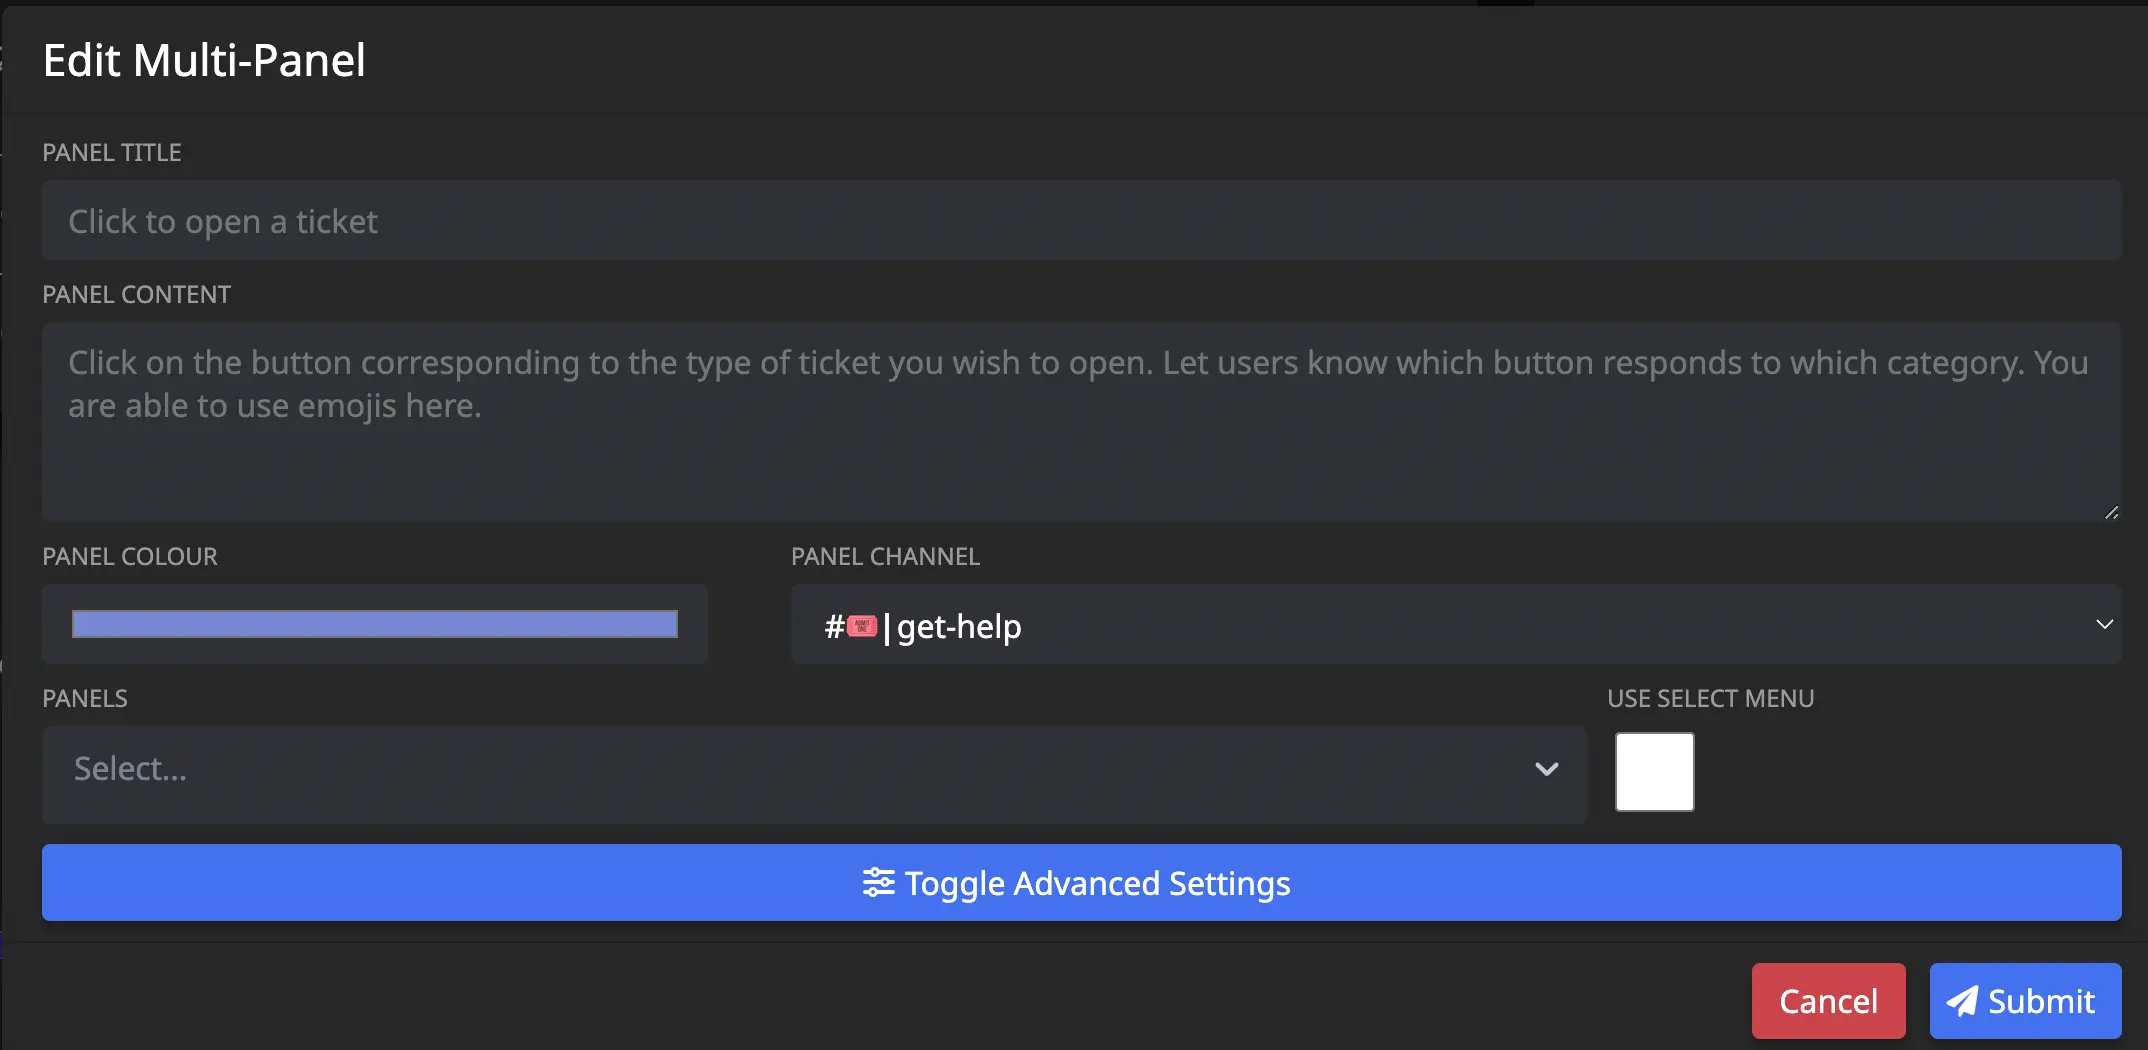
Draw your attention to the Create Multi-Panel card. You'll configure the panel's appearance here:
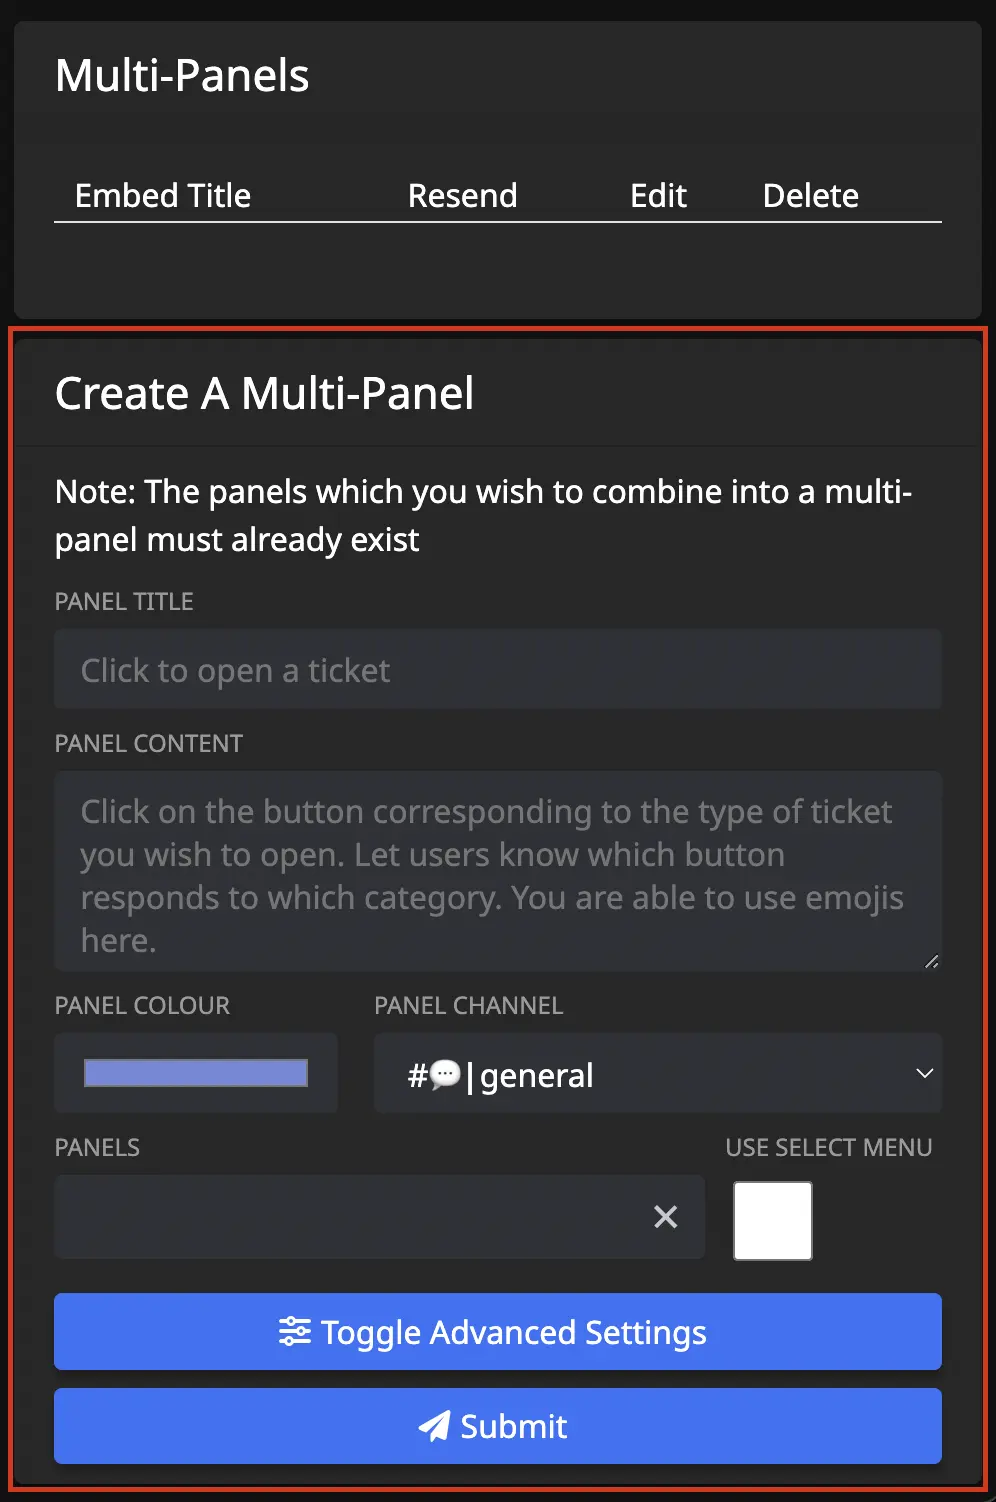
Panel Title
The panel title is the bold text at the top of the embed. The panel title has a maximum length of 255 characters. By default, we set the value to Open a ticket!
Panel Content
The panel content is the text in the long description of the embed. It has a maximum length of 1024 characters. We recommend providing a general overview of how your support system works, such as which languages you have support staff fluent in.
Panel Colour
This is the colour on the left side of the embed. When clicked, a colour picker will open as shown below:

Panel Channel
This is the channel that the multi-panel will be sent in for users to react to. Therefore, this channel should be accessible to your users, and be the only message in the channel to avoid confusion.
This should not be the same as your archive / transcript channel.
Panels
This input field is where you select which of your already made individual panels you'd like to include in the multi-panel.
Use Select Menu
- Unchecked = Ticket options appear as clickable buttons.
- Checked = Ticket options appear as a dropdown menu.
Advanced Settings
Upon clicking Toggle Advanced Settings, you'll have extra fields displayed to you:
Large Image URL
Input a URL link to an image here, it will be shown underneath the welcome message.
- File path MUST end in .png - easy trick is to send the image as a message in a discord channel, then right click the message and choose "Copy Link." Paste link into the input.
Small Image URL
Input a URL link to an image here, it will be shown to the right of the welcome message.
- File path MUST end in .png - easy trick is to send the image as a message in a discord channel, then right click the message and choose "Copy Link." Paste link into the input.
Completion
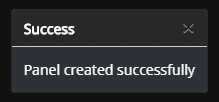
Once you have configured the multi-panel to your liking, click Submit and the panel will be created in your server. You should be shown a success message in the bottom right hand corner of your screen if successful, or an appropriate error message if you made a mistake:
- If you leave any fields blank, the default values will be used.
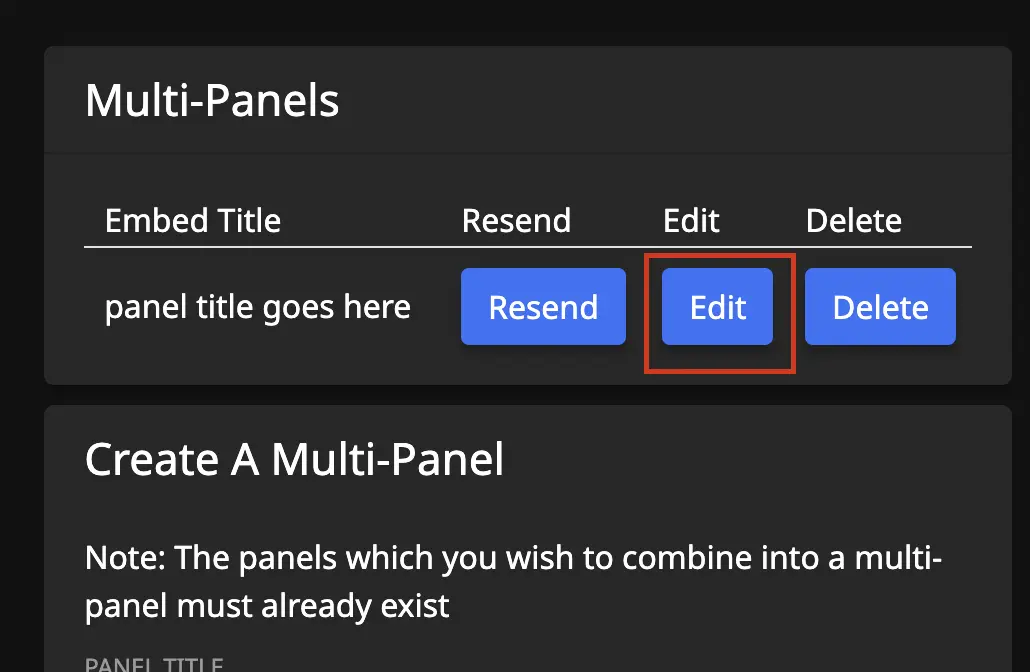
Editing
If you wish to update a multi-panel at a later date, simply click the edit button in the list of multi-panels and the editing modal will be opened:
You can also delete a multi-panel by clicking the Delete button, or deleting the message containing the multi-panel in Discord. If you only delete the message in Discord, the multi-panel will continue to exist on your Dashboard and you can resubmit it to Discord if needed.